

Photo by NordWood Themes on Unsplash
A guide to set up a project for building a Component Library
Creating a Component Library


Prologue
A Design system is a set of rules used by all the elements involved in it in order to maintain consistency across a project. This usually includes style guides, reusable components and designs. Design system helps scale products while maintaining consistency all along. All the components included with it use the same fonts, colors and other design patterns. Some examples are the Material UI and Carbon Design System. I recently got the privilege of working in a team that was aimed at creating a Design system and maintaining it. While creating a design sysem involves a lot of other very crucial things for example, deciding brand colors, fonts, spacing etc.), another very important part of it is creating a Component Library. Here, I'll be sharing how can you set everything up to create and build components.
Init Project
Let's start by setting up the project.
Choose a wise name for your project and create a folder for it. I am naming mine as fake-design-system. Run npm init -y in your folder. This creates a package.json file in the folder which we can use to define our project, install dependencies and many other things. The -y flag is optional. The -y flag auto-fills some fields in the json. Package.json by default uses the folder name as the project name. Edit it if you want according to your project name.
Add React and Typescript
While not absolutely necessary, using Typescript can help you manage your code better. Lets add react first:
Install React
npm install react react-dom
Make sure you mark these as peerDependencies in your package.json file. peerDependencies are a way of notifying other projects that use this package that "I will work only when this version of react and react-dom are installed". It helps us isolate our project to a specific version of react. Read more about peerDependencies here.
To add a proper typescript support to our project we'll have to install these dependencies. These packages contain the type declarations for react, node and react dom. You can optionally also install typescript to run typescript commands locally.
Install TypeScript and types
npm install -D @types/node @types/react @types/react-dom typescript
Add tsconfig
tsconfig.json is a file that is used to convert types into declarations and extract them from the resulting JavaScript code into a separate file. It is also used to configure options to consider while building the project. While you can create the file manually and add options as you wish, npx provides a command that creates a basic tsconfig for you.
npx tsc --init
It has a lot of options configured but all of them are explained as comments in the tsconfig.json itself.
We need to add 2 extra fields namely include and exclude. The tsconfig.json file is used by the build script to know about the build options. In the include option we need to specify a list of folders that contain typescript files and need to be compiled. The exclude tells typescript and the build script what files not to consider while compiling and building. The target option is used to force a specific version of JavaScript to compile to.
Create an entry file
An entry file is a file which contains the exports of all the functions and components which serves as a single point of access to everything that's exported. We'll use this file to build our entire library.
Create a src folder inside the root of your project and create an index.ts file inside it which will serve as the entry file for us.
Create a sample function
To test out whether our project works we'll create a sample function that logs out a lovely greeting!
Create a utils folder in the root of your project and create and index.ts file in it. All of the utility functions that we write will be exported through this file. For our test purposes, lets create a Greeting.ts and add a greetFunction inside it.
export const greetFunction = (name: string) => console.log(`Hello ${name}`);
Now, open the index.ts and export the greet function like so:
export * from './Greeting.ts';
Now we can access the greetFunction from our package itself since this will be now ultimately exported from the index,js which is generated after the build.
Build Project
Lets setup build for our project!
Install rollup
Rollup is a bundler which is popular for generating ready-to-ship builds of project. Install rollup and the rollup plugins
npm install -D rollup @rollup/plugin-commonjs @rollup/plugin-node-resolve @rollup/plugin-typescript
Plugins are the additional packages that rollup uses understand and parse relevant code. There are plugins for various purposes like scss or postcss, for parsing typescript files, etc.
Configure rollup
Rollup needs a configuration file to build our project.
Create a rollup.config.js in the root of your project and add these options:
import resolve from '@rollup/plugin-node-resolve';
import commonjs from '@rollup/plugin-commonjs';
import typescript from '@rollup/plugin-typescript';

export default {
    input: './src/index.ts',
    output: {
        dir: 'dist',
        format: "cjs"
    },
    plugins: [
        resolve(),
        commonjs(),
        typescript({
            tsconfig: "./tsconfig.json",
            declaration: true,
            declarationDir: "dist"
        })
    ],
    external: ['react', 'react-dom']
}
Lets go through the options one by one:
- the
inputproperty is used to provide the entry file for the build which contains the exports of everything we need - the
outputobject contains the name of the build folder and the format in which the javaScript needs to be converted to in order to encapsulate code and make it work in different browsers. I highly recommend you read this article to know more about common js - the
pluginproperty contains an array of plugins that we need to use for the build.- The commonjs and resolve plugins work together to convert JavaScript to commonjs or
cjs - The typescript plugin is used to compile all of our typescript into javascript. It requires a path to the
tsconfigfile to configure options. ThedeclarationanddeclarationDirproperties are used to generate and store the type definitions. Every function or component that is exported and also the package itself needs to be declared in order for it be compatible with TypeScript projects
- The commonjs and resolve plugins work together to convert JavaScript to commonjs or
- The
externalproperty contains the list of external dependencies which tells rollup not to consider them when bundling our project
Run the build script
Okay, It's time. Head over to your package.json file and add a build script like so:
build: rollup -c
Now you can run this script to generate a build:
npm run build
Hold tight for about 5 seconds. If everything goes well, you should see a dist folder in the root of your project and the following terminal output:
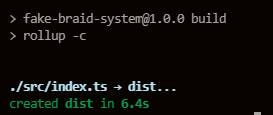
Awesome!
In the dist folder you will see 2 files. The index.js contains compiled JavaScript code and the index.d.ts contains the type declarations for the functions and components. You must reference the index.js file in your package.json as the entry file so that other projects using the package know where to look for the components.
Add this line to your package.json:
main: "dist/index.js"
Conversely, you can import the package JSON in your build script and provide this key as the input file path.
Also, add a typings field in your package JSON for anyone to know where to look for the package's type declarations. Typescript projects require a type declared for imported packages/modules.
Optionally you can add a package called rimraf which can be used to delete the dist folder every-time before building it.
Prepend it to your build script like so:
build: rimraf dist && rollup -c
Going a step further: Lerna
Lerna is a tool that helps you maintain individual packages in a project. You can maintain and publish individual packages under the same project and also maintain their versions individually.
Init Lerna
npx lerna init
This creates a packages folder in the root of your project. You can add your packages here. It also creates a lerna.json file which contains all the information regarding the current project version, the packages and their version, etc. It also adds lerna package as a dev dependency to your project.
Creating packages
Lerna provides a simple command to create a boilerplate for your projects.
npx lerna create package-name
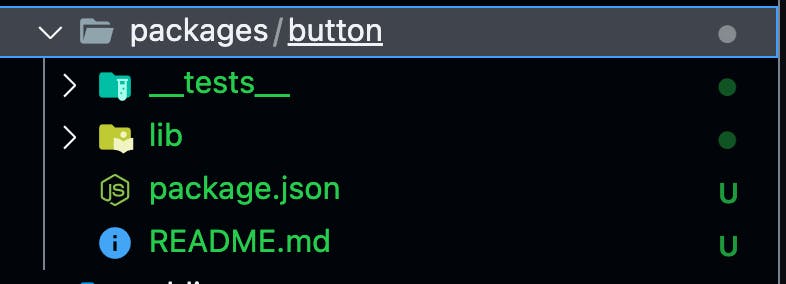
Replace the package-name with the name of your package. Suppose you are publishing components as packages, you can create a Button component and publish it.
Lerna will ask you a bunch of straightforward questions regarding your package like the name, initial version, description, the entry file name, etc. Once answered, it will create the following folder structure for you:
Bootstrapping packages
As the official documentation says "Lerna links different projects within the repo so they can import each other without having to publish anything to npm". This process is called bootstrapping. Lerna links those packages to one another. Add a lerna command in your root package.json. Since lerna is added as a dev dependency by default, adding the command lets you use lerna like so:
npm run lerna bootstrap
Optionally, you can use npx to run lerna commands.
Building packages with Lerna
Lerna helps you build project individually. Therefore you can add rollup configs to your packages separately. One common practice is to have a base rollup config in the root and extend it with additional options in the packages.
Add a build command to your package's package.json file.
When we run build lerna build from the root of the project, lerna looks for the build script in each of your packages and runs it.
Run the following command from the project root:
npx lerna run build
Lerna has some other useful commands as well like
- publish - To publish packages to the specified repositories
- version - To update versions of your projects and many more!
Pro Tip:
Whenever you run a command with lerna run, it looks for the same command in your packages and runs it. So lerna is not restricted to its official commands!. You can specify additional commands in your packages and run the command on all of them at once!. Lets say you have a lint command on each of your packages, running npx lerna run lint will allow you to run linting on all the packages!
Conclusion
And thats it folks! Building a component library is a fantastic journey. At the end you get a nice set of tools that you can use anywhere to quickly build stuff!. Also, the collection itself is a wonderful thing to look at!
Good bye till we meet again!